一、Programming Manual For Windows
Programming Tool、Driver Download Link:https://pan.baidu.com/s/1ugVAJ35VeWkUoKOjiLgvXQ?pwd=3iyb 提取码: 3iyb
- Install the USB driver.
If a driver has been installed previously, please update the USB driver (DriverAssitant) to version V5.1.1 or later.
1.1 Extract the downloaded compressed package to an English-only path, then double-click DriverInstall.exe to install the driver.
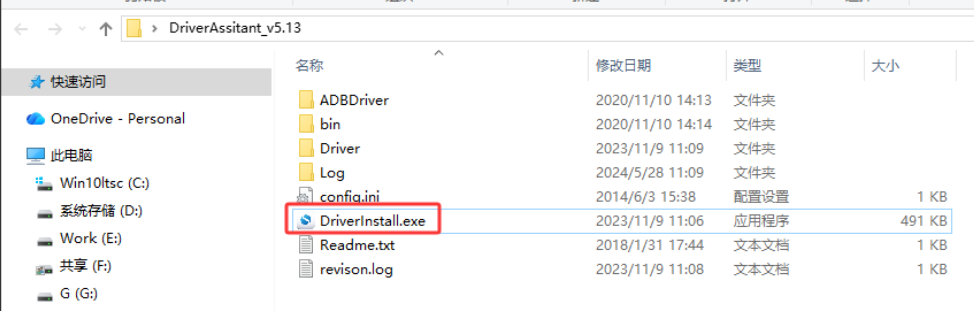
1.2 Click Install Driver. 
1.3.Upon successful installation, a prompt will indicate Installation succeeded.
Click OK to exit the installer and close the driver installation window. 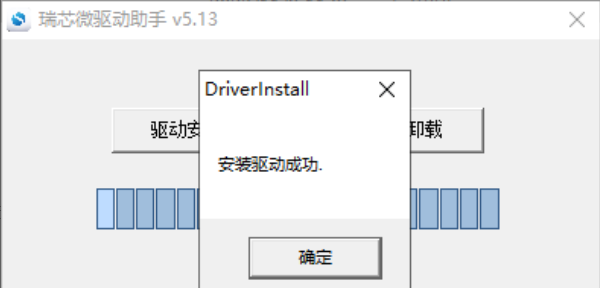
2. Firmware Burning
2.2.Connect the PC to the USB2.0 burning port of RK3566 with a USB A-to-A cable. Press and hold the Recovery key (the small hole near the Ethernet port), then apply 5V power supply.
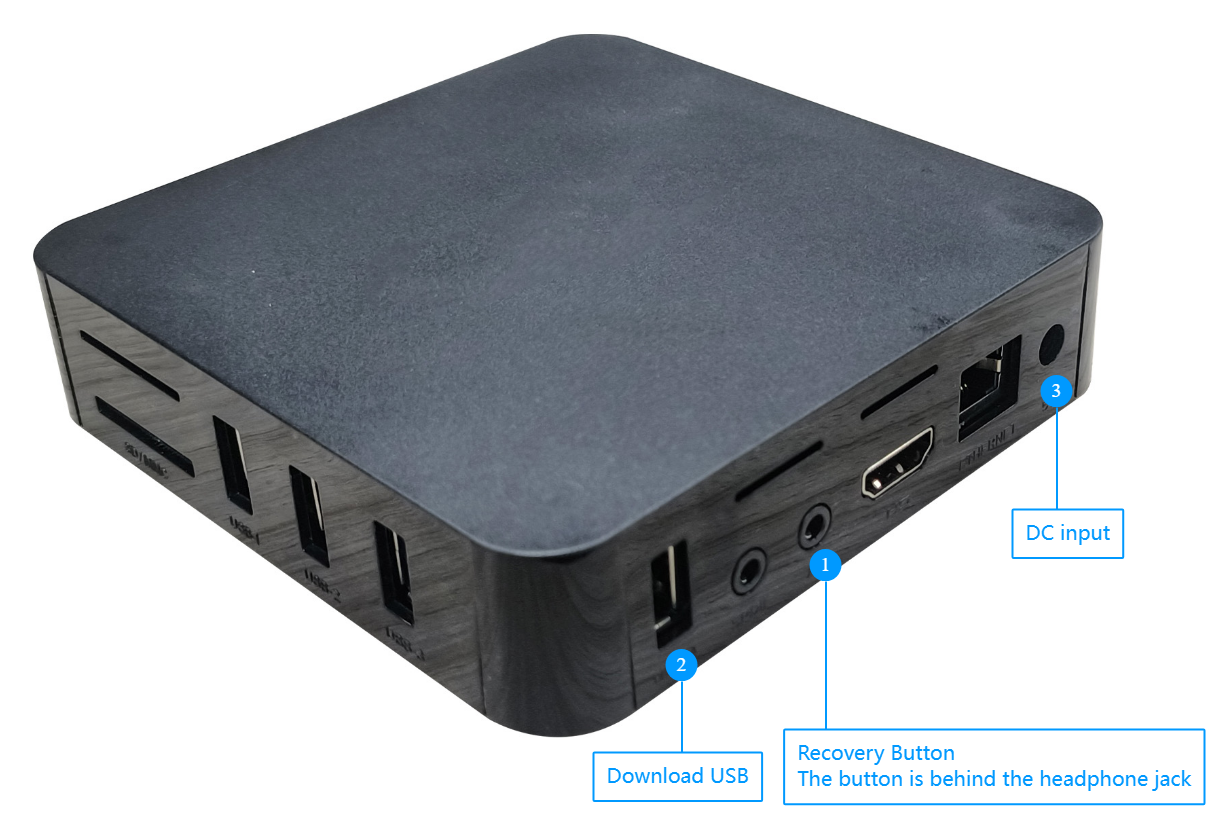 Image Removed Image Removed Image Added Image Added
2.3.The flashing tool will automatically detect the device.
Release the Recovery key after "LOADER " appears. 
2.4.Click Upgrade Firmware and select the firmware file.。

2.5. After selecting the required firmware, click Upgrade.
The upgrade progress will be displayed on the right panel, and the upgrade will start. 
2.6. When the progress on the right reaches 100% and the flashing tool detects an ADB device, the firmware burning is completed. 
MAC Address Burning Tool:
RKDevInfoWriteTool_Setup_V1.1.4_210527.7z
Link: https://pan.baidu.com/s/1Uywwj-jyKwdB-4mzSL0rcg?pwd=khau Extract Code: khau
Before burning the MAC address, please install the USB driver first. Refer to Section 2.1.1 Installing the USB Driver for details. (Skip this step if already installed.) 3.1 Installation Steps
Download and extract the burning tool, then double‑click RKDevInfoWriteTool_Setup_V1.1.4_210527 to install the tool.
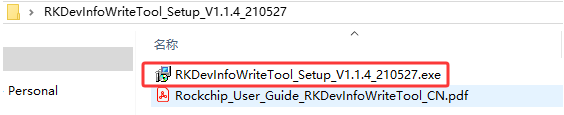
3.2. Open RKDevInfoWriteTool → Settings → LAN MAC
- Select Multi LANMAC
- Check MAC0 and MAC1
- Select Auto Increment / Manual
- Tick Hexadecimal
- Enter the MAC address
- Enter the burning quantity
- Click Save
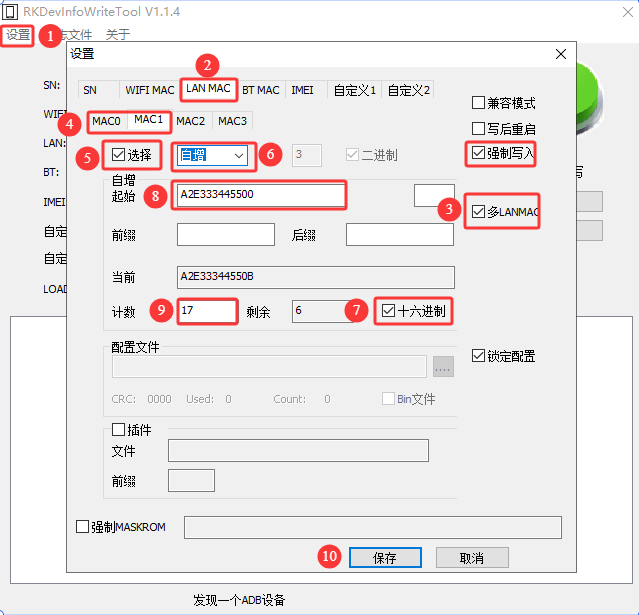
3.3.If entering the MAC address manually, input two MAC addresses in the burning interface, separated by a semicolon ";".
For this model, MAC1 is the recognized MAC address. 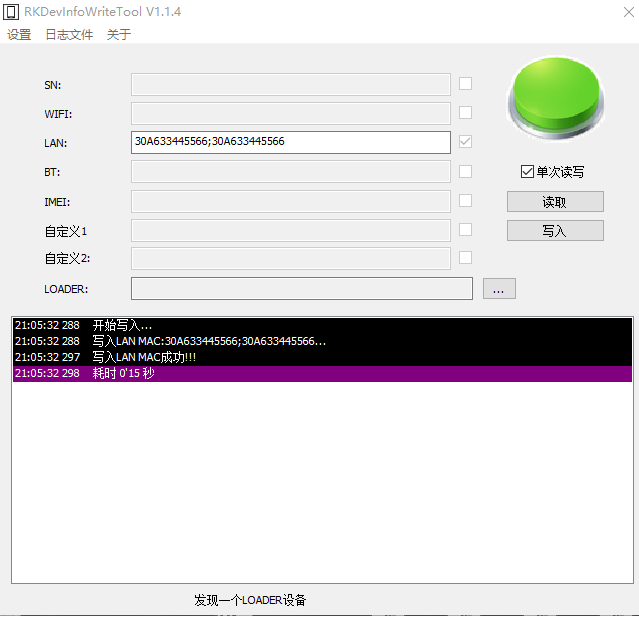
3.4.Connect the Type-C burning interface, press and hold the Recovery key (the small hole near the Ethernet port), then power on with 12V.
The burning tool will automatically detect the device. Release the Recovery key after "One LOADER device found" appears, then click Write.
Refer to Section 1.1.2 for entering Loader mode. 二、Programming Manual For Linux1.Tool Preparation | 代码块 |
|---|
| Flashing Tool: Linux_Upgrade_Tool, version V2.26 or later is recommended.
Path in Linux SDK: tools/linux/Linux_Upgrade_Tool/
Path in Android SDK: RKTools/linux/Linux_Upgrade_Tool/
Packaging Tool: mkupdate.sh, used to package multiple partition images into a single update.img file.
Path: tools/linux/Linux_Pack_Firmware/rockdev/mkupdate.sh |
<SDK>/tools/linux/ToolsRelease.txt
The Rockchip USB Driver Assistant is located at:
<SDK>/tools/windows/DriverAssitant_v5.13.zip
The SDK provides a Linux flashing tool (Linux_Upgrade_Tool V2.26 or later).
The tool is located in the project root directory:
<SDK>/tools/linux/Linux_Upgrade_Tool/Linux_Upgrade_Tool
Method for packaging update.img firmware on Linux
Run the following command to generate update.img:
<SDK>/tools/linux/Linux_Pack_Firmware/rockdev/mkupdate.sh
- Linux SDK:
tools/linux/Linux_Upgrade_Tool/ - Android SDK:
RKTools/linux/Linux_Upgrade_Tool/
Common Flashing Commands| 代码块 |
|---|
| sudo upgrade_tool ul MiniLoaderAll.bin
sudo upgrade_tool di -p parameter.txt
sudo upgrade_tool di -u uboot.img
sudo upgrade_tool di -t trust.img
sudo upgrade_tool di -b boot.img
sudo upgrade_tool di -k kernel.img
sudo upgrade_tool di -m misc.img
sudo upgrade_tool di -r recovery.img
sudo upgrade_tool di -s system.img
sudo upgrade_tool di -rootfs rootfs.img
sudo upgrade_tool uf update.img |
| 